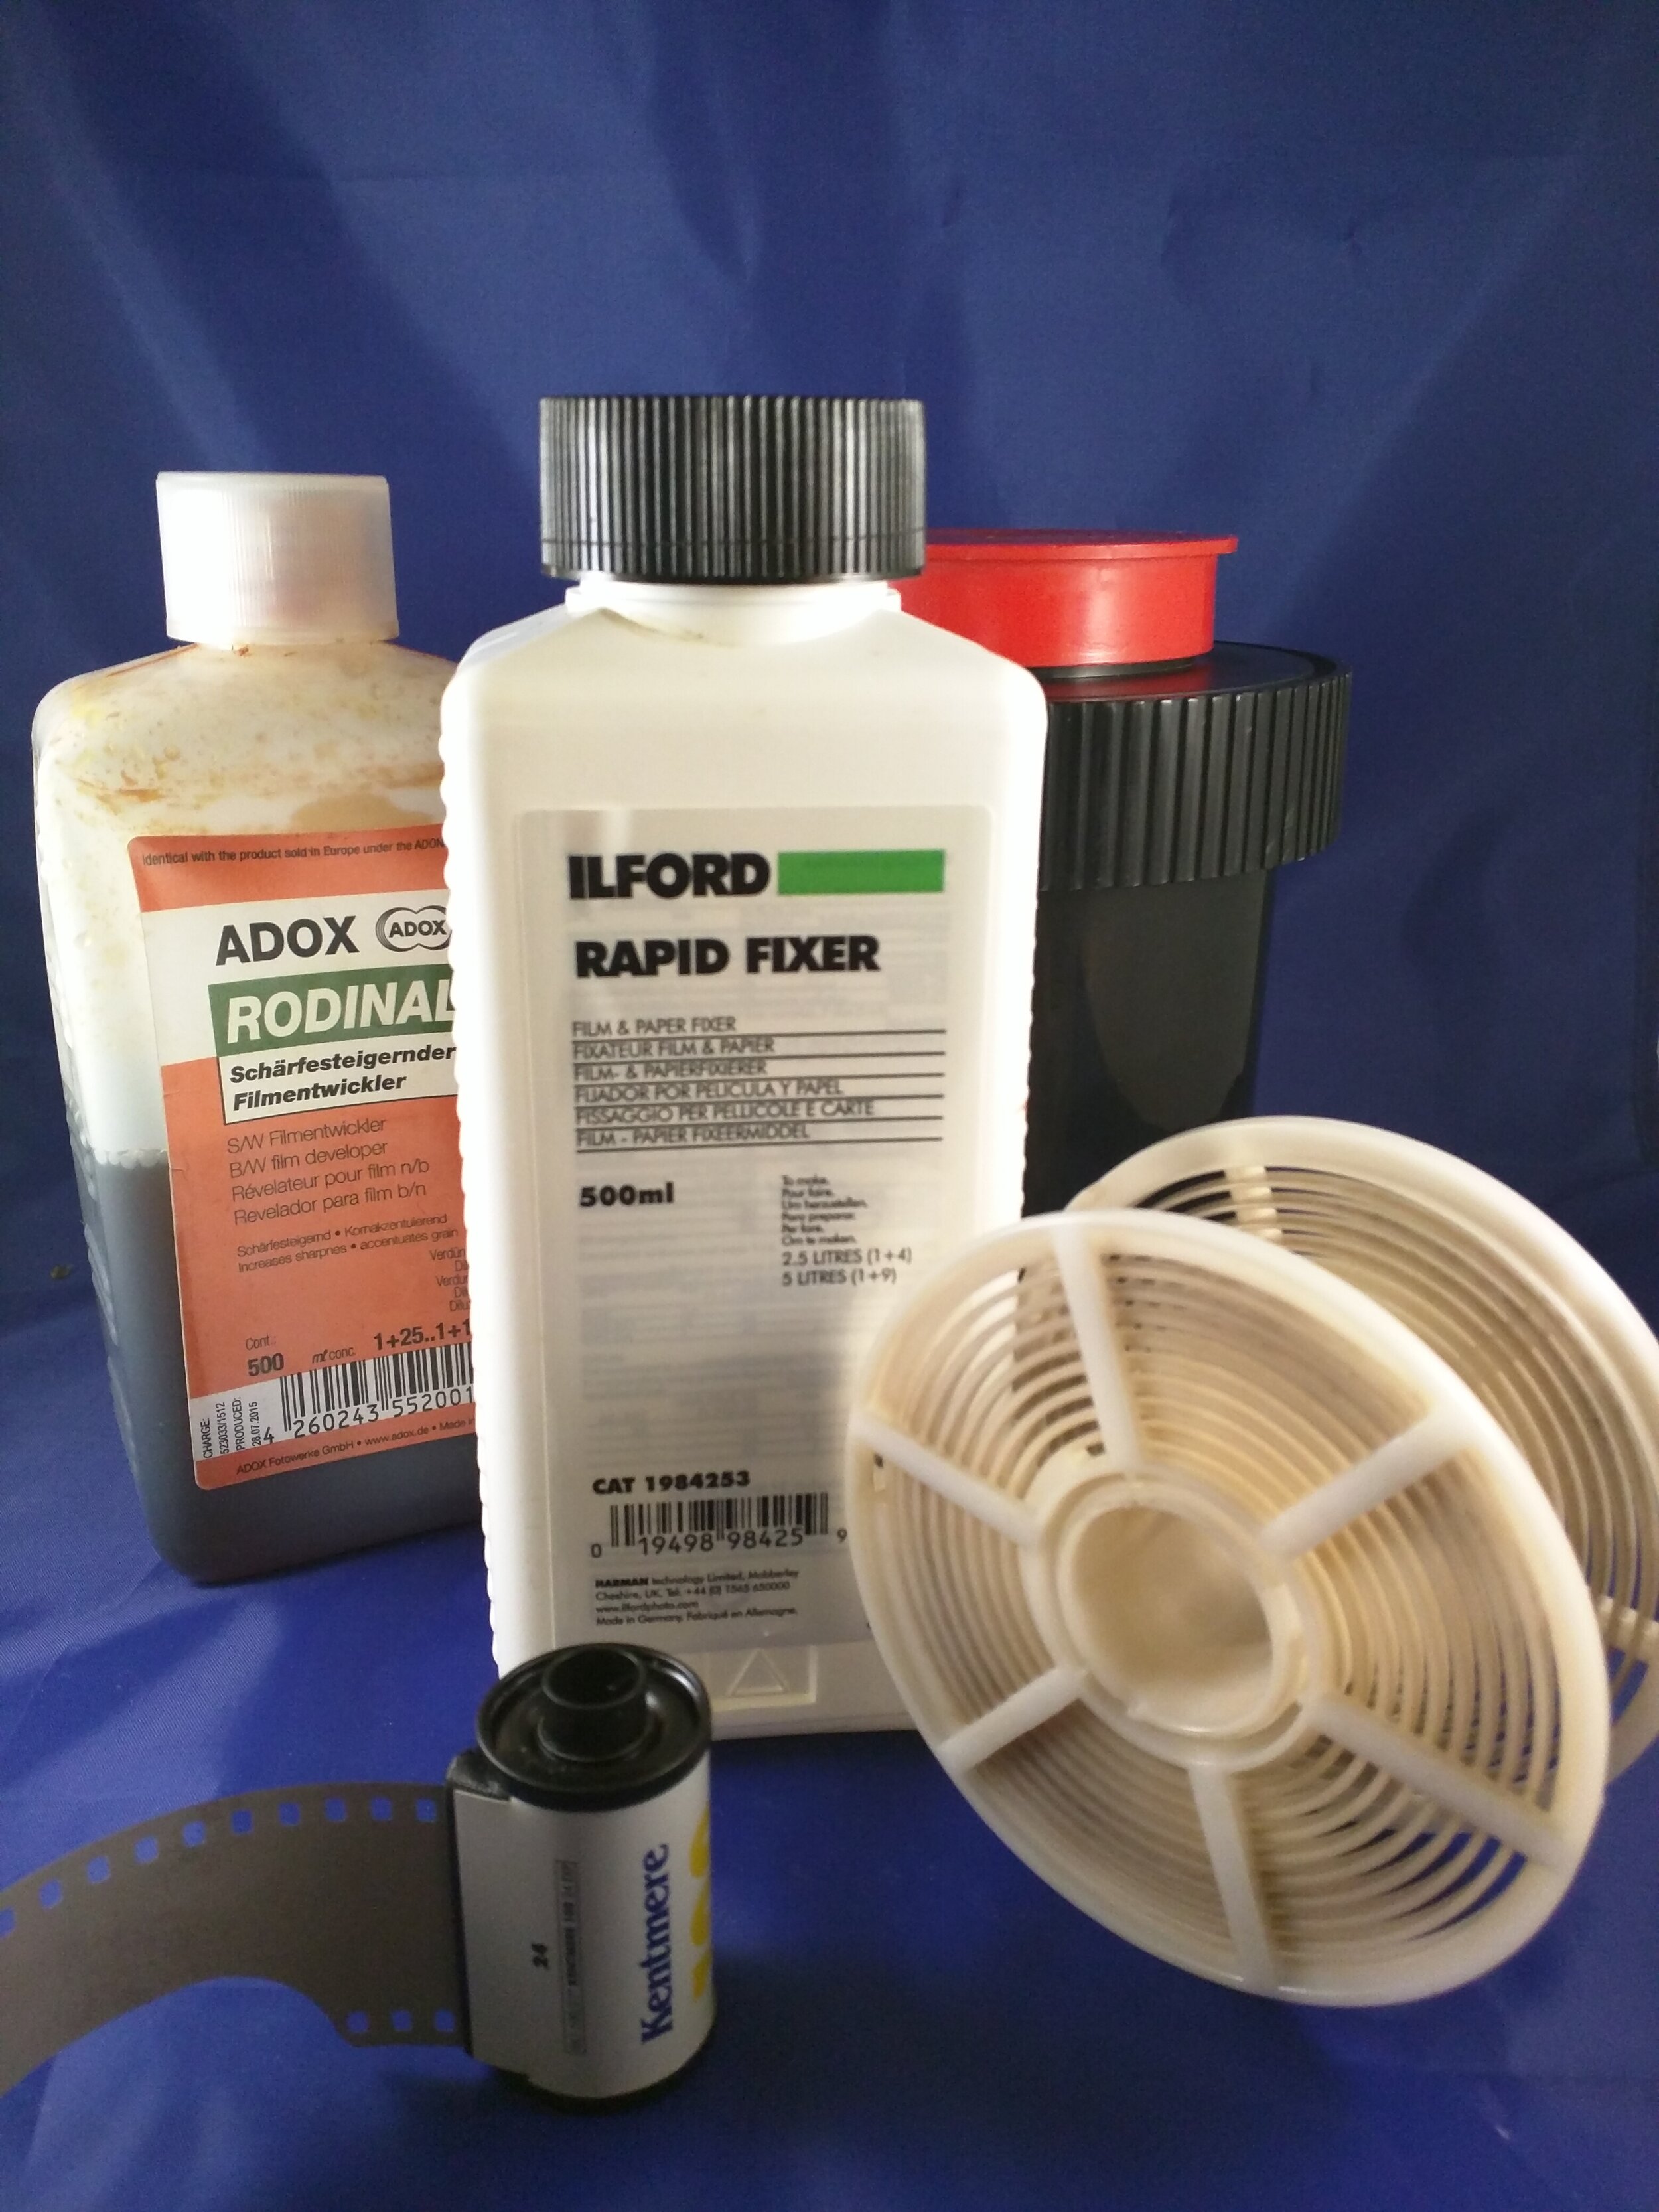
Happy New Year! I have been scratching my head for the last week trying to figure out what to do this year to make my photography and this site better. Well, for my photography, I plan on doing a 365 project (more likely a 52 week project) and some more photography contests. For the site, I will try for two posts a week. What they’ll be is as much a mystery to me as it is to you, but I hope you will be entertained. With that being said, let’s start by taking a look at what’s in my lab. I don’t really have a lab, I have a kitchen. Sometimes I have a bathroom. Both work rather well as makeshift developing labs, although it would take quite a bit of work to turn either into a darkroom. Labs don’t need to be sterile or light safe, though. They really just need a supply of fresh, running water.Getting started in film doesn’t require a lab, but it can certainly add to the joy of shooting in film. Generally a black and white developing kit consists of developer, stop bath (I use water), Fixer, a 1 liter measuring cup, day-safe tank, spool, bottle opener, scissors (optional), a clip or hanger to hold developed negatives, and a dark bag.
 Developer. This is the most important part, of course. I have used a couple different developers for black and white photography, even developing in instant coffee. For the last half of 2016 I have exclusively used Adox Rodinal and stand development. In this method I mix 1:100 Rodinal to water, and let the negatives sit in the soup for an hour. This is the set it and forget it method. It yields good contrast and buttery smooth grain.Stop Bath. After developing, it’s necessary to stop the developer from doing anymore developing. The are chemical stop baths, but I prefer water. I generally flush my tank for a couple minutes with fresh running water. No muss, no fuss.Fixer. Fixer can’t be substituted like stop bath or developer; until you actually fix the negatives, they’re still light sensitive. The best Fixer I’ve found is Ilford Rapid Fixer. The bottle below contains a solution I mixed about 3 months ago and it still only takes two minutes to fix the film!
 It’s not hard to test Fixer. Simply take the tab from the beginning of a roll and drop it in a glass jar, submerging it in Fixer solution. Time it. As soon as the negative is transparent, it’s fixed. That’s the time it takes to fix your film.
 Dark Bag. Film has to be loaded in total darkness. Red lights are only good for film paper, not the film itself. This presents problems for those of us without access to completely light-tight rooms. Enter the Paterson Changing Bag. It looks like a T-shirt, but is really a light safe bag with sleeves to put your hands in while you load your film onto the developing spool. After a few runs working with this bag, loading spools is second nature.
 The process itself is very straight forward: develop, stop, fix. Some photographers use a drying agent to prevent spots on the film, but I just use a drop of dish soap in the rinse after I’m done fixing. Most of the chemicals are toxic, so the less I use the better I feel about developing film.Developing film isn’t hard to do. It’s actually fun. It feels like Christmas since developing each roll and seeing the results is like opening presents. It’s also not expensive. A complete lab setup plus the camera and a year of film is less than a new DSLR. Light safe tank and bag are about $50. The chemicals will run another $30. Misc supplies like the measuring cups and stuff are able $10. The scanner, arguably the most expensive part, will cost $150-$200. Throw in a camera for another $50 (or less) and you’ve got the whole rig, ready to start your awesome film adventures.

What’s In My Lab ?
Leave a Reply
You must be logged in to post a comment.
phil
A while back I rolled out all the costs of shooting digital vs film, as a way of testing my wife’s hypothesis that film is far more expensive. Comparing equipping oneself with a high quality pre-autofocus 35mm camera and lab gear, film, chemicals and scanner to a high quality compact digital (in this case, currently a Canon G1xMk3), the unit cost of photographs archived is a little more for B/W film than color digital, but not enough to offset the entertainment value of using a fine old machine and the magic of the developing/scanning process. Of course other than the disposables of film, chemicals and probably the scanner, the film photograph hardware is a “buy-once” proposition (OK, maybe $100 for a CLA every few years), will survive the nuclear holocaust, and is very unlikely to go on the fritz in the middle of a vacation. Whereas the digital equipment has a very finite lifespan (I’ve noticed it to be 3-5 years at best), has an output that may not be durable over decades, and tends to fail at exactly the wrong time.